Tuesday, November 30, 2010

SAMM - Avocado and Shrimp Sandwiches

SAMM - Share a Meal Monday is a linkup that I've been reading on Laura's blog for awhile, and I finally have something worthy of sharing.

I first had one of these sandwiches years ago at a sandwich shop in the beltline in Calgary called 'The Alligator Pear' and decided it was time to try copying it.  Arvid and I love them (can't get Bryn to try it yet), so we've made them quite a few times.

Here's what you'll need for 4 sandwiches:

8 slices whole wheat bread
A little margerine
A little mayonaise
1 ripe avocado
1 tsp lemon juice
3/4 cup (or so) tiny shrimp, thawed
Sliced cheese - mozza or swiss

Start with nice soft whole wheat bread.  I generally make the bread we eat around here, but it often doesn't turn out very soft, so I've been buying store bought stuff for this - just the cheap brands, but they're fresh, so they're soft.

Mash the avocado flesh.  We like it a little chunky.  Then mix in the lemon juice.  Spread the bread slices with margerine (optional) and mayonaise (we've never tried Miracle Whip - I think it would taste funny).  For each sandwich, spread the avocado mixture on one slice, then top with the shrimp.  Lay slices of cheese on the other slice of bread, then put them together.

Not rocket science, but delicious!


Linking To: Share a Meal Monday

Thursday, November 25, 2010

The Train Cake

For the September birthdays in my family, we had a joint birthday party.  There are 4 of us with birthdays that month, so it just makes sense to do one big party.  I got to make the cake.  Or cakes, in this case.  Since three of the birthdays are kids, I decided to do a fun kiddie cake.

Here's a few pictures of the finished product.


They were pretty straightforward, and I didn't take any pictures during the process.  I started out with 7 chocolate cakes (using my favourite recipe) baked in a mini-loaf pan, and one baked in mini muffin pan.  The loaf pan has 8 loaves, the mini muffin pan makes a dozen and the recipe filled more than the two pans - I used a regular muffin pan to use up the extra.

To make the engine, I cut one of the loaf cakes to sort of notch onto the back of another standing upright. then I added the mini cupcake for the smoke stack, gluing it all together with chocolate buttercream. Now that  I'm trying to describe it, I wish I'd taken a picture before decorating it.

I used tinted buttercream icing for pretty much all the decorating, except the black - I used chocolate buttercream and added some black colour, and the wheels - they are candies I found at the grocery store.

It was probably the most challenging cake I've done so far, since all the pieces were so small they didn't stay put very well as I iced.  I knocked the engine over a couple of times as I was piping on all the little stars.  Probably not a project I'll do again for a long time, but the end product turned out alright.

Saturday, November 13, 2010

The Puke!

So, Bryn is 19 months old now (well, she will be in a few days) and today she puked for the very first time.  She was never much of a spitter as a baby, for which I was very grateful! Are you listening, Baby in my Tummy?  Anyway this afternoon, we went to A&W for lunch (we had coupons) and Bryn ate lots of fries and ketchup, along with the sandwich we brought for her (she doesn't like hamburgers).  After that, we took a little nap/rest, then had a tickle fest.  She giggled, and giggled, saying 'More' over and over, so Arvid and I kept tickling.  We then proceeded downstairs to make start dinner and I heard Bryn gagging!?  I looked over and there it was, puke!  Thank goodness it happened in the kitchen and not on the carpeted floor of the bedroom!  I have a really big problem with vomit, so I'm really glad Arvid was home.  I had been hoping that I'd be able to handle my own kids' puke, but no such luck.  I'm in trouble.  Sorry no pictures for this one!

Tuesday, October 26, 2010

Mama

So I've been trying to teach Bryn for months to call for me (ie: Mama, I'm Awake) instead of crying when she's ready to get out of bed after a nap or night of sleep.  Well, we're making progress - this morning she was crying with a 'Mama' thrown in occasionally.  Maybe someday there will be less crying coming from that room, but for now, I'll take it!

Tuesday, September 21, 2010

Laura's Giveaway

Hi All.

I'm working on a couple more cakes for this weekend, so stay tuned for pictures of those.

In the meantime, my sister-in-law Laura is having a giveaway on her Blog.  It's a gorgeous quilled letter wall hanging (in the letter of your choice).  Please check it out.  She's super crafty and her blog is a lot of fun to read.

Friday, August 20, 2010

Renee's Birthday Cakes

When I finished my last cake decorating class, my mom asked me if I'd do the cake for my sister Renee's birthday, a few weeks away.  I was excited to try something new, and started looking around the Wilton website for ideas. What I found was this.  It was perfect.  Renee is a seamstress, and makes lovely wedding dresses.  I decided to just do the big cake, as that would be enough for the usual birthday crowd.

I rented the cake pan from 
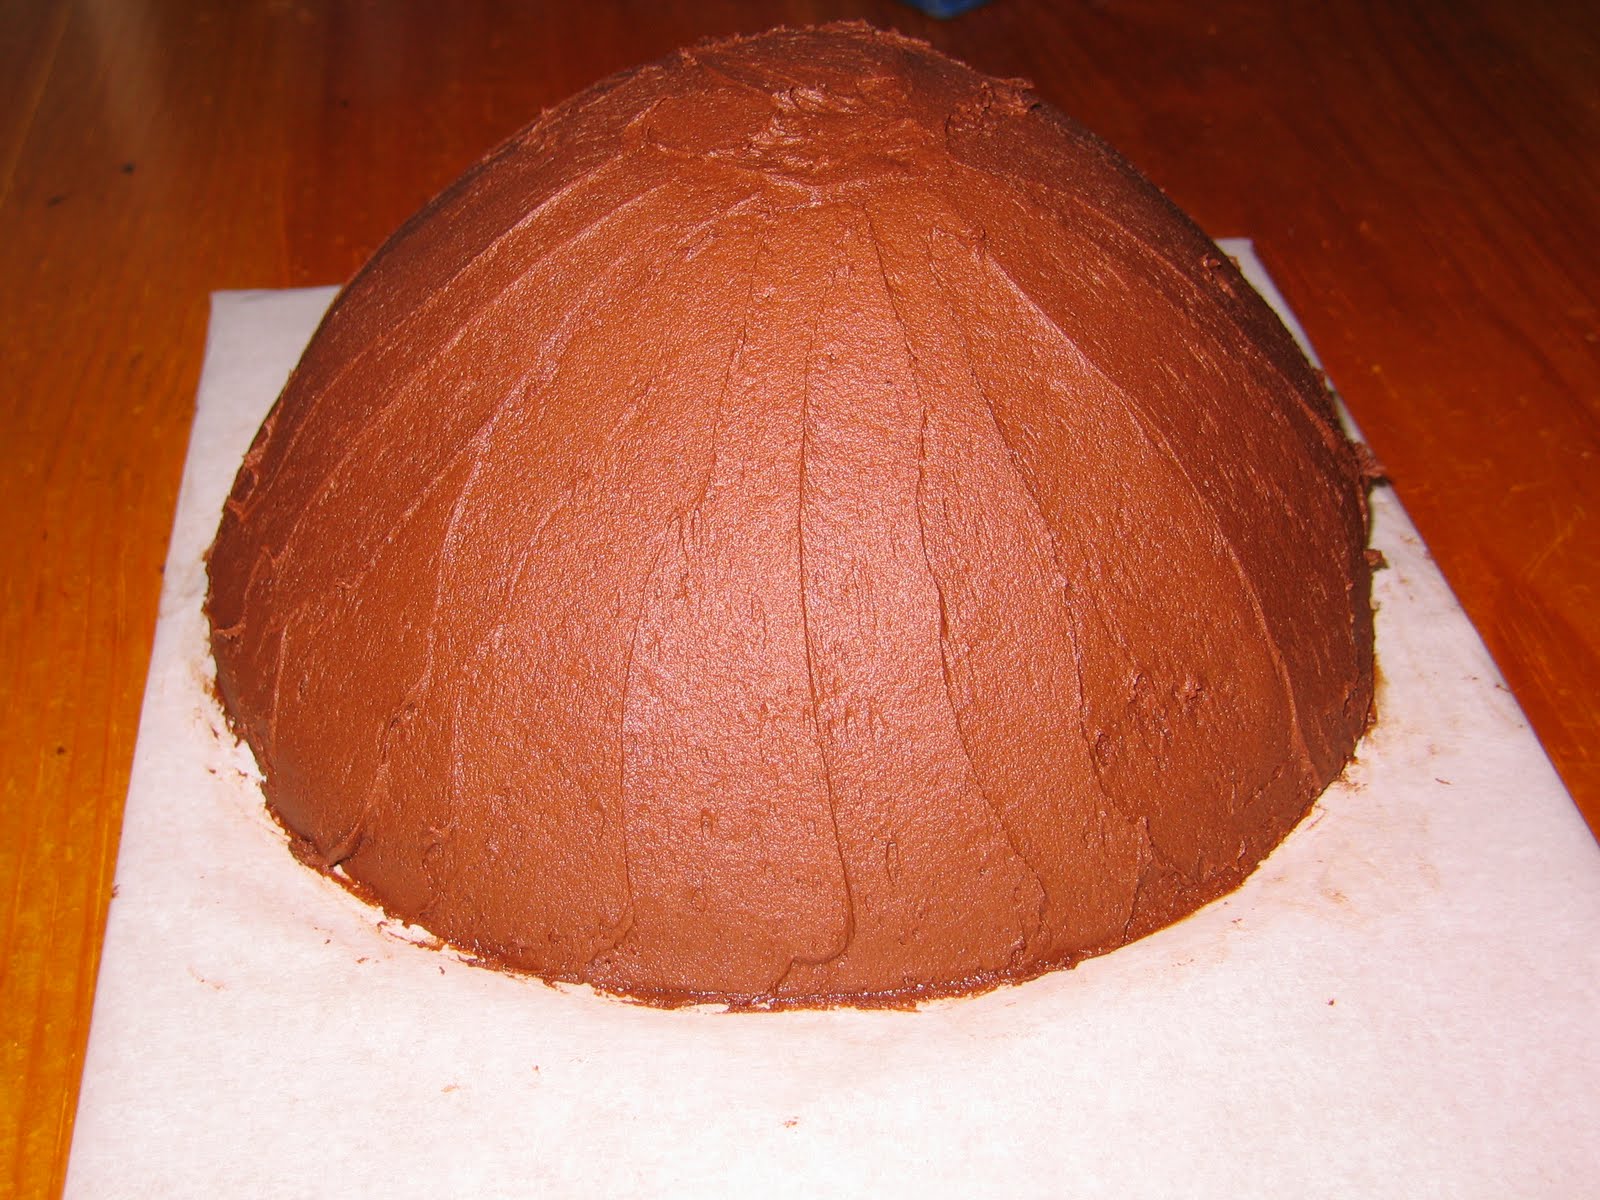
PM Hobbycraft. When I got it home I thought I'd better make 2 cakes, just in case one wasn't enough.  The pan wasn't nearly as big as I thought it would be.  So I came up with a colour and flavour scheme for the second cake (yellow & blue/ lemon & blueberry).


After a couple of mishaps with baking the cakes (I really need to get a louder timer), I had two lovely cakes in my freezer, waiting for the day of the party.


I had to figure out how to make the bodices.  The pattern on the website uses fondant, but I've never worked with it at all before, and I didn't want to practice on a 'real' project.  I'm also too cheap to buy a whole box of fondant for such a small required amount.  I was not going to cover the whole dress in fondant - it doesn't taste nearly as good as 100% butter buttercream.  So, I made them with royal icing.  I used 4 copies of the pattern provided on the website, covered them with waxed paper on a piece of cardboard, and piped and filled in the pattern with the icing, 2 pink and 2 white, as well as piping the hangers.  I waited a few days, then used more royal icing to glue each pair of bodice pieces together, sandwiching the hanger in between.  It worked a whole lot better than I expected it to.

I also had to make all the flowers.  I used a few different drop flower tips (I honestly can't remember which ones), and piped them all on a cookie sheet lined again with waxed paper.  I had decided to use gold peal dust to make the flowers shimmer.  There are two application methods listed on the pearl dust package - I chose the wrong one.  I chose to try the wet method, mixing the dust with clear vanilla and brushing it on with a soft brush.  The shimmer was all blotchy.  Bad enough that I scrapped them all and with only 36 hours 'til party time, re-piped all my flowers and applied the gold dust the with a dry brush.  That was definitely the right choice.  They looked much better.  Unfortunately, the flowers lost some of their definition as I dabbed on the dust, so I don't think I'll use the it on buttercream flowers again - at least not the little flowers.

Once all was prepped, I just had to put it all together.  I cut a slit in the top of each cake, after icing it, and tucked in the bodices.  I then glued all the flowers on with more buttercream icing.  I used  (or broke!) every one of the pink flowers, but only about half of the yellow.


This is actually a simplified account of this project.  I ran into snag after snag, but it was a great learning experience.  I'm glad I have no current cake projects in the works and I can just relax and get ready to go on vacation.

Sunday, August 8, 2010

I just realized...


I just realized that I haven't posted any pictures of Bryn.  So here are a few of my recent favourites.


Most of Bryn's best pictures relate to food. There is a reason she's chubby - and not just 'cause she's mine!

Saturday, August 7, 2010

Look Mommy, Mato!

No, Bryn isn't talking so clearly yet.  It's my niece, Gwen.  I've been watching her for my sister Lisa a couple of days a week while she figures out a more permanent child care solution.  Last Thursday we were waiting for Lisa to arrive at the end of the day, playing in the front yard, when I noticed that Bryn had a couple of crab apples in her hands (we have a tree in the back yard).  I didn't really think much of it - she loves to pick up the fallen apples.  By the time Lisa got here, Gwen had one of the apples.  She went up to her Mommy and said (something like), 'Look Mommy, Mato!'  Lisa said, 'Oh, have you got an apple?' (again, I'm paraphrasing).  And Gwen responded 'No, Mommy, Mato!'  We took a closer look and sure enough, it was a little green tomato.  My Bryn had thieved two tomatoes from my plant in the front garden!  I'll have to watch her more closely if I want to have a harvest this year!

Friday, July 30, 2010

Cake Decorating Class #4 - Final

My last 'Decorating Basics' class was yesterday.  It was a pretty intense class, including learning the Ribbon Rose (here's a picture of the best one I managed), as well as learning to do writing, and decorating our final class project cakes.


I had prepped a bunch of drop flowers ahead of time, letting them dry for 24 hours to get them hard enough to move to the cake.


I hadn't planned to write anything on the cake - I was sending it to work with Arvid, so I didn't really want to write 'Happy Birthday'.  So when I was making th icing, I just coloured the stuff I was going to use for icing any green, just for practicing.  Then I decided I should write 'Happy Friday', but I felt really rushed to finish my cake in class (I spent a rediculous amount of time on the roses), so I didn't take the time to prep a better colour for writing.  I wish I had - I think the green of the writing is just too bright.  Oh well, I'll know for next time.


I think, on the whole, it turned out really nicely.  I sent it to work with Arvid, and he said it was a hit (but what free and unexpected cake isn't).  Here are a few more pictures.  Enjoy.

Sunday, July 25, 2010

Cake Decorating Class - #3


This week's cake decorating class was cupcakes - and I had so much fun with them. We filled our cupcakes (I used puréed cherry pie filling), then decorated them.


 We also learned drop flowers and leaves, which I had tried on my own before, but couldn't figure out.  It turns out they're really easy and I just needed to know a few tricks.  I like them a lot, so I'm going to use them on my final cake next week.


My favourite cupcake happened by mistake (so many good things started out that way!).  I was running out of white icing and had a couple of cupcakes left to do, so I added the extra pink icing I had to the bag and just kept piping.  I ended up with the pink and white swirl you see to the left.  I like it so much, I think I'll do it on purpose next time!

Friday, July 16, 2010

Cake Decorating Class - #2

I'm taking a Wilton cake decorating class! It's something I've wanted to do for a long time, but it just didn't happen until now.

I'm really enjoying it.  Yesterday we made our first cakes (the first week was cookies).  I was surprised at how easily the techniques came to me - I thought I'd have trouble with anything but stars.  It's amazing what I difference using the right icing consistency can make!


Here is a picture of the finished product.

It's the first time I've torted a cake (cut it in half and filled it with something).  I'm really happy that I bought the cake leveler, which made the torting cut very easy.

I'm excited for next week - we're filling cupcakes and learning drop flowers - yay!


PS: I realize there's no Cake Decorating Class #1 post, but I forgot to take pictures last week, so it would have been a pretty boring post.

Tuesday, July 13, 2010

So, all of a sudden...

So, all of a sudden, Bryn likes grapes.  She's always hated them.  When I started her on solid foods, they (canned ones at that point) were the only thing she would spit out!  And now, today, she can't get enough of them.  She sees them on my lunch plate and keeps signing 'more, more', pointing at them. Cool!

Sunday, June 20, 2010

I'm not very crafty

So, I've decided that since I haven't had time for crafts lately, I'm going to start blogging about my regular life here, too.

Tuesday, May 11, 2010

Summer Sleep Sack

So, I finally finished Bryn's summer sleepsack.  It's not nearly as cute as the winter one, but it's functional.  I might someday put an applique on the front (as was my original plan), but I don't really know what kind of design to choose.  I don't think a cow is cute enough for me to spend the energy one.  And I haven't found a good cow applique pattern.  I originally planned to do a teddy bear, but the fabric I had on hand was cows.  Not sure what to do about this dilemma. For now, it will keep my Bryn cozy while she sleeps.

Friday, April 23, 2010

Yay, I have followers!

Thanks for being interested, ladies!

Winter Sleepsack

When Bryn started wiggling herself out of her nighttime wrappings, I bought a second-hand sleepsack that I loved - but my Bryn grew out of it so quickly!  I decided that it would be cheaper to make one than to buy another, which is not actually true, when I could have been working during the hours I spent on it.  But it's far cuter than anything I could have found in a store.  Here are the pictures. 

I used fabric I had in my quilting stash, since it's basically a wearable quilt. I took measurements off the sack that I had purchased, and made it much longer so that she'll be able to use it for quite some time.

I've been wanting to pratice appliqué for a while - all my previous attempts have turned out badly - and so this was a perfect time to try.  I scanned a small piece of the front fabric with my printer/scanner and used my computer to enlarge and trace one of the moons on the fabric to make a pattern for the big moon I wanted to appliqué. I cut the moon and a couple stars out of the lining fabric, and stars out of the fabric I used on the front.  I appliqued the outside and batting layers together, mostly to help keep the batting in place when I wash the sack.

I had to buy zipper coil and pulls from a local supply shop and build my own zipper, since it's hard to find a 2 meter long zipper that's the right weight!  It was pretty easy, though, and it allowed me to put 2 pulls on so that you can open the zipper from either end.

The hardest part was trying to figure out how turn turn the thing right side out after sewing the armholes and neckhole and the zipper.  I searched the internet and enlisted the help of my sister (seamstress extraordinaire!), but we couldn't figure it out.  In the end I unstitched the armholes and just bound them with bias tape that I had on hand from another project using the same lining fabric.  And I think that's not a bad solution after all, since the bias binding will stand up to far more wear than just a seam.

Now that the sack is done (it took me at least a month, since I could only work on it while Bryn was sleeping), it's spring and it's getting too warm for such a heavy sack.  So I'm making a summer weight one.  I can't wait to see how it turns out!

Monday, April 19, 2010

Bryn's Ladybug Birthday Cake

For Bryn's first birthday I decided to make a ladybug cake.  I got the idea from Cake Decorating Corner, but I couldn't find the right Pyrex bowls, so I searched ladybug cakes again and found Jenny Cisney's blog post.  I used her ideas for the body shape.

Here are some pictures of the cake, along with a basic idea of how I made it.


I used a 9" Pyrex bowl and a 9" round cake pan for the body, and a 2 cup Pyrex measuring cup for the head.   A double layer cake batch filled the bowl just right, and a second double layer batch was enough for the cake pan, the head (about 1 cup of batter, I think), and 6 cupcakes.

I used a half-batch of Wilton's Chocolate Buttercream Icing to glue the body pieces together - I made it pretty stiff.  I used Wilton's Buttercream Icing with strawberry juice reduction instead of milk, to start the red colour and to give it a strawberry flavour.  It took a lot of red food colouring (the good Wilton 'No-Taste' red gel) to get the colour so rich.  It didn't look red at first, but it turned quite red as I let it sit.  I made all the icing the day before.

I used black food colouring on another half-batch of chocolate buttercream icing for the face and spots.

I covered the body with a flat layer of red icing.  I then piped on the white (eyes), black and more red using star tips (#16 and #17).  It looked pretty neat with the flat red and just the spots and face done in stars. Next time I might make the flat red layer much thicker and just add the black with the piping bag.  It would sure have saved a lot of time and my hand wouldn't have been so tired!

Thanks to Renee Bowkett for the first 2 pictures!

The First Post...

I've been more crafty than usual lately, and I wanted a place to share my craftiness, so here it is.